


How to Use a CNC Machine for Wood: Tips & Tricks
Welcome to the exciting world of CNC machines and woodworking! You’re in the right place if you’re gearing up for your next CNC project. In this guide, we’ll explore how to use a CNC machine for wood, transforming your creative visions into beautifully crafted wooden pieces.
So, why CNC woodworking? Simple. It combines precision, creativity, and the sheer joy of making something with your hands (and a bit of high-tech help). Whether you’re a seasoned woodworker or just starting, CNC machines open up a new realm of possibilities. They’re not just tools; they’re your creative partners in crime!
Imagine this: You’ve got this fantastic idea for a project. Maybe it’s a beautifully carved wooden sign, an intricate piece of art, or something as practical as custom shelving. You sketch it out, and then – here’s the magic part – your CNC machine brings it to life, cutting and carving with a precision that’s just mind-blowing. It’s like watching your dreams take physical form right before your eyes!
But wait, it’s not all just ‘set it and forget it.’ There’s a bit of a learning curve, sure. However, don’t sweat it. I’m here to break it down for you, making it as easy as pie. We’ll go through everything step-by-step, from setting up your CNC machine to choosing the right materials, designing your project, and watching as your CNC machine does its dance. And trust me, it’s a dance worth watching.
So, are you ready to dive into the world of CNC woodworking? Let’s get started and turn those ideas into reality!
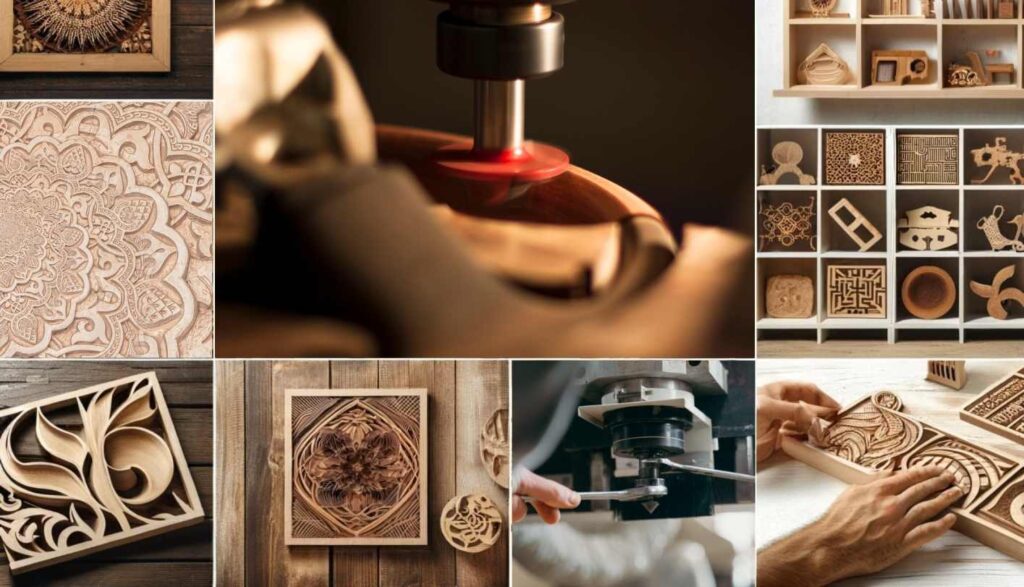
What is CNC Routing for Woodworking?
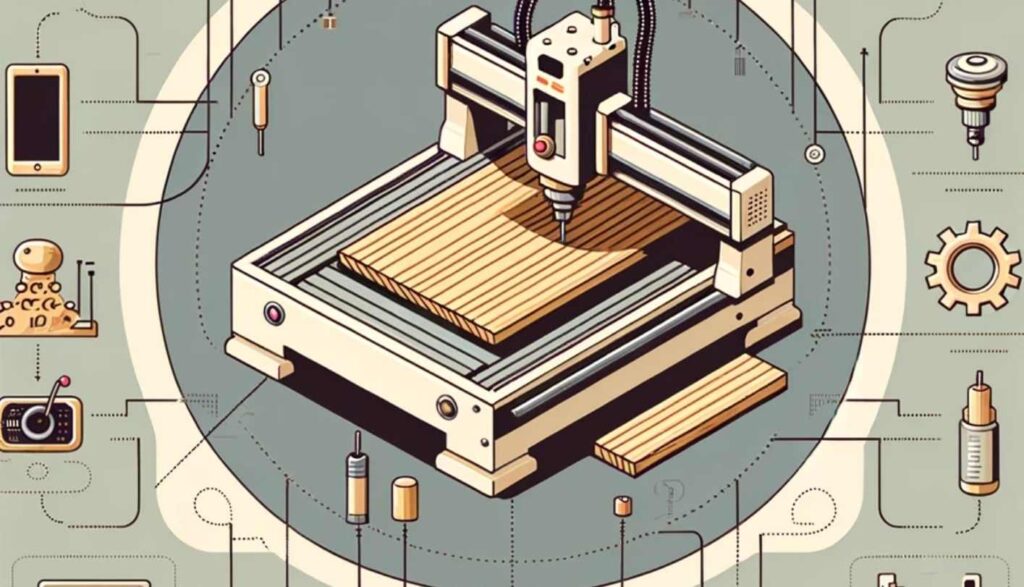
CNC Routers: The Basics
CNC routing for woodworking is like having a high-tech wizard in your workshop. But what exactly is it? At its core, CNC stands for Computer Numerical Control. CNC routers are advanced machines that carve, etch, and shape wood based on digital designs. They’re like ultra-precise, tireless craftsmen, ready to bring your creative visions to life.
Why CNC Routing?
Now, you might wonder why there is all the buzz about CNC routing. First off, it’s a game-changer in accuracy. Gone are the days of human error and manual tool limitations. CNC routers follow your exact design specifications, ensuring flawless execution every time. Plus, they’re incredibly versatile. From intricate art pieces to robust furniture, these machines handle a diverse array of projects with ease.
Is A CNC Router Machine for Everyone
And here’s the best part: A CNC router isn’t exclusive to professional woodworkers. They are increasingly popular among hobbyists and DIY enthusiasts. With some learning and practice, anyone can use these machines to transform ordinary wood into extraordinary works of art.
Step-by-Step Instructions to Set Up and Use a CNC Router
Are you embarking on your CNC routing journey? Fantastic! Let’s dive deep into setting up your workspace and getting you ready for when your CNC machine arrives. This guide is tailored for DIY enthusiasts and hobbyists eager to get every detail right.
1. Preparing Your Workspace
- Choose the Ideal Location: Your CNC router needs a dedicated space. Look for a well-lit, ventilated area with enough room for the machine and your future projects. A garage or a spacious workshop is ideal.
- Organizing Tools and Accessories: Have a place for everything and keep everything in its place. Organize your tools, bits, clamps, and other accessories in an easily accessible manner. Wall-mounted pegboards or dedicated drawers can be a lifesaver.
- Electrical Setup: Ensure your workspace has the necessary electrical outlets and power requirements for your CNC machine. It’s often overlooked but super important. Consider consulting an electrician if you’re unsure about power specifications.
- Dust Management: Woodworking gets messy, so think about dust collection. Setting up a dust extractor or a shop vac system will help keep your workspace clean and safe.
- Safety First: Equip your workspace with safety gear – goggles, ear protection, and dust masks are necessary. Also, have a first-aid kit handy, just in case.
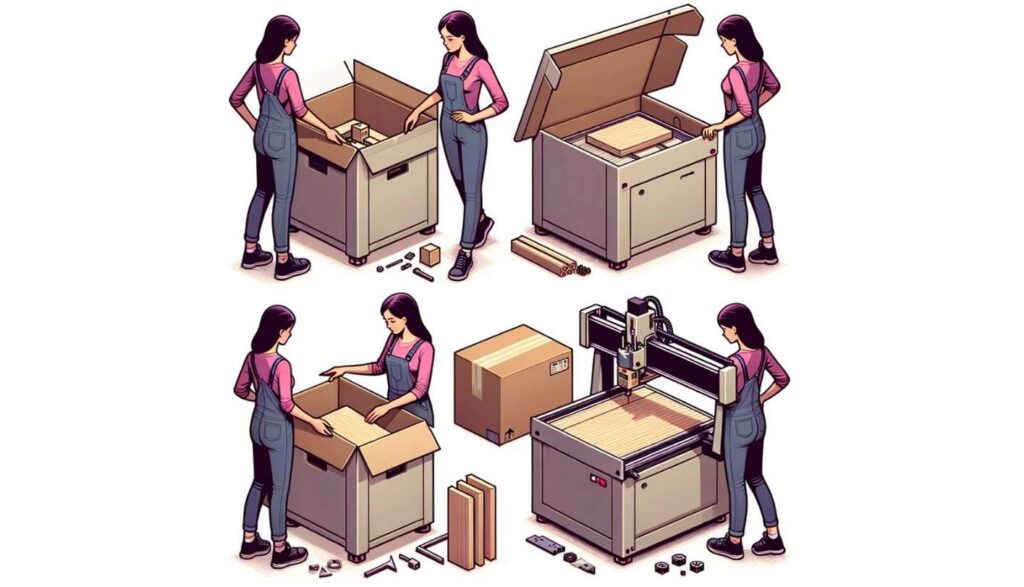
2. Receiving and Assembling Your CNC Router
- Unboxing with Care: When your CNC router arrives, take your time to unbox it carefully. Check all the parts against the provided list to ensure nothing is missing or damaged.
- Assembly According to Manufacturer’s Instructions: Each CNC router is a bit different, so closely follow the manufacturer’s instructions for assembly. Take it slow, and double-check each step.
- Familiarize Yourself with the Machine: Before you switch it on, take some time to get familiar with the parts of your CNC router. Understanding its components will make the learning process smoother.
3. Setting Up Your CNC Router
- Software Installation: Install the CNC routing software on your computer. This will be your design and command center.
- Calibration: While specific calibration steps vary, generally, you’ll need to ensure the router’s axes move smoothly and accurately. Refer to your router’s manual for precise instructions.
- Testing the Machine: Run a test operation as recommended by the manufacturer. This could be a simple pre-set pattern to ensure everything works as it should.
4. Designing Your First Project
- From Sketch to Software: Start with a rough sketch of your project and then use the CNC software to create a digital model. Experiment with different designs; don’t be afraid to make mistakes – that’s how you learn!
- Material Selection: Different woods have different properties. Choose a material that suits your project’s needs in terms of hardness, texture, and aesthetics.
- Setting Tool Paths: The software will guide you in setting tool paths – the route your router bit will follow. Start with simple ways and experiment with more complex designs as you gain confidence.
Struggling to create the perfect design for your CNC projects can be a common hurdle, whether you’re a hobbyist or a professional.
Discover how our custom design services can turn your ideas into reality, saving time and ensuring top-notch results. Learn more about how we can create your designs on our Graphic Design Services.
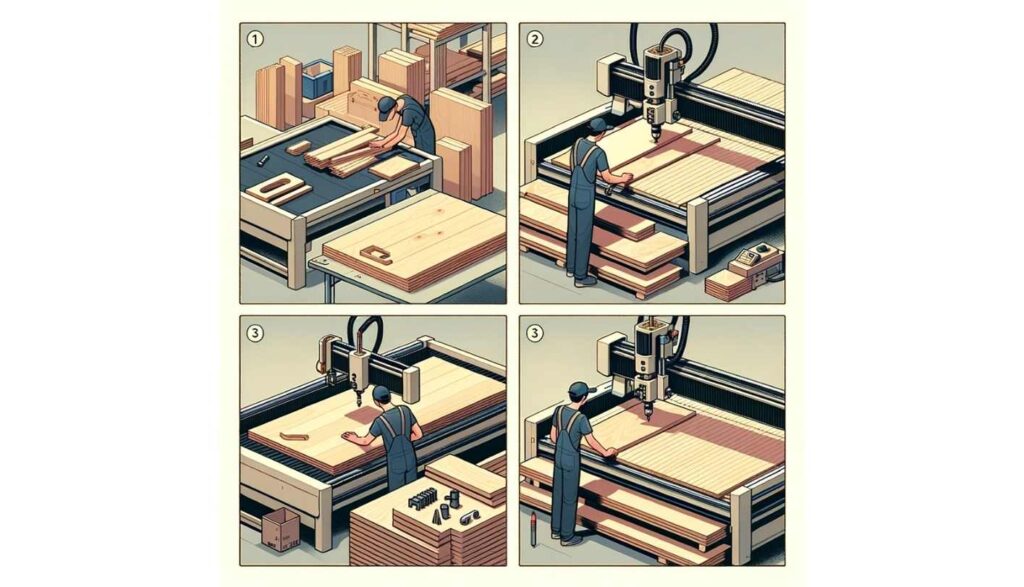
5. Machining Your Design
- Securing Your Material: Properly secure the wood onto the CNC bed. This step is crucial for precision and safety.
- Starting Your Project: Follow your tool paths and let the router do its work. Keep a watchful eye, especially on your first few projects.
- Post-Machining Work: Once the machine has done its part, you might need hand-finishing, like sanding or applying a finish. This adds a personal touch to your project.
By following these detailed steps, you’re setting yourself up for success in CNC routing. Remember, practice makes perfect, and every project is a learning opportunity. So, roll up your sleeves, and let’s get started on this exciting DIY journey!
Designing Your First Project
Embarking on your first CNC project is an exhilarating step into the world of digital fabrication. This section will guide you through designing your project while focusing on critical aspects like tool paths, router bits, etc. Let’s dive in!
Conceptualizing Your Design
Your journey begins with an idea. The first step is conceptualizing what you want to create, whether a simple shape or a complex pattern. Think about the dimensions, the overall look, and how it fits into your chosen material. Remember, the only limit here is your imagination!
Choosing the Right Tools
Selecting the appropriate tools for your design is crucial. The most common tools in CNC routing are router bits and end mills. Each tool has a specific purpose; for example, end mills are great for making precise cuts, while router bits can be used for various cutting and shaping tasks. Consider the cut depth and the material you are working with when selecting your tools.
Creating Tool Paths in Your Design Software
Tool paths are the routes that your CNC machine will follow to bring your design to life. Using CAD (Computer-Aided Design) software, you’ll plot these paths based on your design. This process involves assigning specific actions to your router bits or end mills, like cutting depths and the sequence of cuts. Think of tool paths as the roadmap your CNC machine will follow.
Understanding G-Code
Once your tool paths are set, the software will generate a G-code file. This file contains instructions your CNC machine will use to execute your design. It tells the machine exactly where to move, how deep to cut, and which tools to use. G-code is the universal language that bridges your design with the physical world.
Managing Dust and Debris
When designing your project, it’s also important to consider the aftermath, specifically the dust and debris generated during the cutting process. A dust collector is a valuable addition to your CNC setup. Not only does it keep your workspace clean, but it also helps maintain the longevity of your CNC machine and its components, like the spindle.
Finalizing Your Design
Before sending your design to the CNC machine, double-check all parameters. Ensure your tool paths are correct, the cut depths are appropriate for your material, and the G-code accurately reflects your design. A final review can save a lot of time and resources.
Ready to Cut
You can bring your project to life with your design complete and your G-code generated. Remember, the first project is a learning experience. Don’t be afraid to make adjustments and experiment as you go.
Executing the CNC Router Machine
After designing your project, the next exhilarating phase is bringing it to life. Executing the machining process on your CNC router involves a series of crucial steps, from loading your materials to starting the job. This guide will walk you through each stage, ensuring a smooth and successful CNC routing experience.
Setting Up Your CNC Router Table
First, prepare your CNC router table. Ensuring the table is clean and free from debris or previous project remnants is essential. A well-prepared table is the foundation of accurate machining. Make sure it’s level and stable to support your material during the routing process.
Loading the Material
Carefully load your chosen material onto the CNC router table. Secure it firmly to prevent any movement during the machining process. The material should be appropriately aligned, as this will directly affect the precision of your cuts. Check that it’s clamped down evenly to avoid unnecessary errors or mishaps.
Choosing and Installing Tools
Select the appropriate tools for your project. V-bits are excellent for detailed engraving and provide a unique profile to your cuts. On the other hand, an end mill can handle a broader range of cutting tasks, from drilling to slotting. Ensure that the tool is correctly installed in the spindle of your CNC router. An adequately installed tool is crucial for precision and safety.
Setting Up the Machine
Before starting the job, set the origin point on your CNC router. This is the reference point from which all the tool paths will be executed. Double-check the settings and parameters to ensure they align with the specifications of your project. This step is vital for achieving the desired outcome.
Loading the G-Code
Now, load the G-code file you created during the design phase into the CNC router’s control software. This file contains all the instructions for the machine to execute your project. Ensure that the G-code is loaded correctly and corresponds to the material and tools you have set up.
Begin the Machining Process
With everything set up, it’s time to start the machining process. Initiate the job on your CNC router and monitor the process. The first cut is always the most thrilling as you watch your design transform from a digital concept into a tangible object. Keep an eye on the tool’s movement and the material, ensuring everything proceeds as planned.
Monitoring and Adjustments
Throughout the machining process, stay vigilant. Be ready to make necessary adjustments or pause the job if something seems wrong. This could involve changing a dull tool, adjusting the feed rate, or recalibrating if the material shifts.
Key Considerations for Successfully Executing CNC Wood Projects
Successfully executing CNC wood projects goes beyond just following the process steps. It involves understanding key considerations that can significantly impact the quality and precision of your work. Here are some vital aspects to keep in mind:
Material Selection
Understanding Wood Properties: Different types of wood react differently under the CNC router. Consider factors like hardness, grain pattern, and potential for warping. Choosing the right wood can make a significant difference in the outcome.
Consistent Thickness: Ensure that your wood is uniformly thick. Inconsistencies can lead to uneven cuts and may affect the accuracy of your project.
Tool Selection and Maintenance
Choosing the Right Tools: Selecting the appropriate tools for your project is crucial. Different router bits and end mills serve different purposes. For example, a spiral up-cut bit is excellent for chip removal, while a down-cut bit provides a cleaner top surface finish.
Regular Tool Maintenance: Keep your tools sharp and clean. Dull or dirty tools can lead to poor cut quality and may even damage your material.
Accurate Setup
Calibrating Your Machine: Regularly check and calibrate your CNC machine. Accurate calibration is critical to ensuring that your cuts are precise and consistent.
Secure Material Mounting: Securely mount your material to the table to prevent movement during machining. This can prevent errors and ensure a smoother finish.
Understanding the Software
Mastering CAD/CAM Software: Spend time learning and understanding your CAD/CAM software. Efficient use of software can significantly enhance the quality and complexity of your designs.
Optimizing Tool Paths: Optimize your tool paths for efficiency and quality. Consider the direction of the grain, the type of cut, and the order of operations.
Dust Management
Effective Dust Collection: Woodworking with a CNC router produces a lot of dust. An efficient dust collection system not only keeps your workspace clean but also maintains the health of your machine and improves visibility during the cutting process.
Safety First
Prioritize Safety: Always follow safety protocols. Wear appropriate personal protective equipment, and ensure your workspace is safe and free from hazards.
Learning from Experience
Trial and Error: Don’t be afraid to experiment. Each project provides an opportunity to learn something new. Take notes of what works and what doesn’t for future reference.
Community Engagement: Engage with the CNC community. Forums, online groups, and local workshops can provide invaluable tips, tricks, and advice.
How to Enhance Your CNC Wood Projects
Once you’ve mastered the basics of CNC routing, it’s time to elevate your projects. Enhancing your CNC wood projects involves improving the technical aspects and infusing creativity and finesse into your work.
Here are some ways to take your CNC wood projects to the next level:
Experiment with Advanced Design Techniques
Incorporating Complex Geometries: Start experimenting with more complex designs in your CAD software. Try integrating intricate geometric patterns or 3D elements into your projects.
Layering and Texture: Add depth and texture to your projects. Layering different materials or using varied cutting depths can create interesting visual effects and tactile experiences.
Mastering Advanced Tool Use
Experimenting with Different Bits: Dive into the world of various router bits. Experiment with specialty bits like taper ball nose bits for detailed 3D carving or V-groove bits for intricate inlay work.
Precision in Detail Work: Focus on refining your detail work. This might mean using smaller bits for finer details or adjusting your tool paths for smoother finishes.
Surface Finishing Techniques
Sanding and Polishing: Invest time in sanding and polishing your projects. A well-sanded piece not only looks better but also feels high-quality.
Creative Finishing Options: Explore different finishing options like staining, painting, or varnishing. These can dramatically change the appearance and feel of your project.
Integrating Additional Materials
Mixed Media Projects: Combine wood with metals, plastics, or glass. This approach can add an entirely new dimension to your projects.
Inlays and Overlays: Practice creating inlays or overlays with contrasting materials for a stunning visual impact.
Exploring Advanced Software Features
Software Proficiency: Let’s dive deeper into the advanced features of your CAD/CAM software. Understanding these features can open up new possibilities in your designs.
Simulation and Testing: Use simulation tools in your software to test and refine your designs before actual cutting. This can save time and materials.
Embracing New Technologies
Keeping Up with Tech: Stay updated with the latest CNC technologies. Incorporating new techniques or software updates can significantly improve your work.
Digital Fabrication Integration: Consider integrating your CNC projects with other digital fabrication methods like 3D printing for unique combinations.
Wrapping Up and My Experience With CNC Wood Routing
Embarking on the CNC woodworking journey blends traditional craftsmanship with innovative technology, leading to endless creative possibilities. Each step, from setting up the CNC router to exploring design intricacies, is vital for skill development. The journey begins when you venture beyond the basics, combining technical skills with creativity to transform wood into art.
My first CNC project was daunting, especially with the concern of wasting valuable wood—a sentiment that many share, given the rising costs. However, this experience underscored the importance of embracing challenges and experimenting with various materials, which is crucial for growth.
CNC woodworking is a path of continuous learning, where each project offers opportunities to expand your creativity and technical prowess. The community around CNC woodworking provides invaluable support and knowledge, encouraging experimentation and exploration.
As you progress, view each project as a chance to enhance your skills and explore the vast possibilities within CNC woodworking. Let your CNC router be a gateway to creativity, urging you to explore, experiment, and enjoy the journey. Here’s to a future of crafting, learning, and evolving with every piece you create.


